Slab Design
The Slab Design dialog allows to perform a check or design of the required reinforcement for selected slab members which are in the same level plane.
Click .
Select one or multiple slab members at the same level.
In the design dialog which opens, insert a name for the ‘’Design Group’’.
Check and adjust settings.
Click OK to close and save the settings or click Calculate to perform the design calculation.
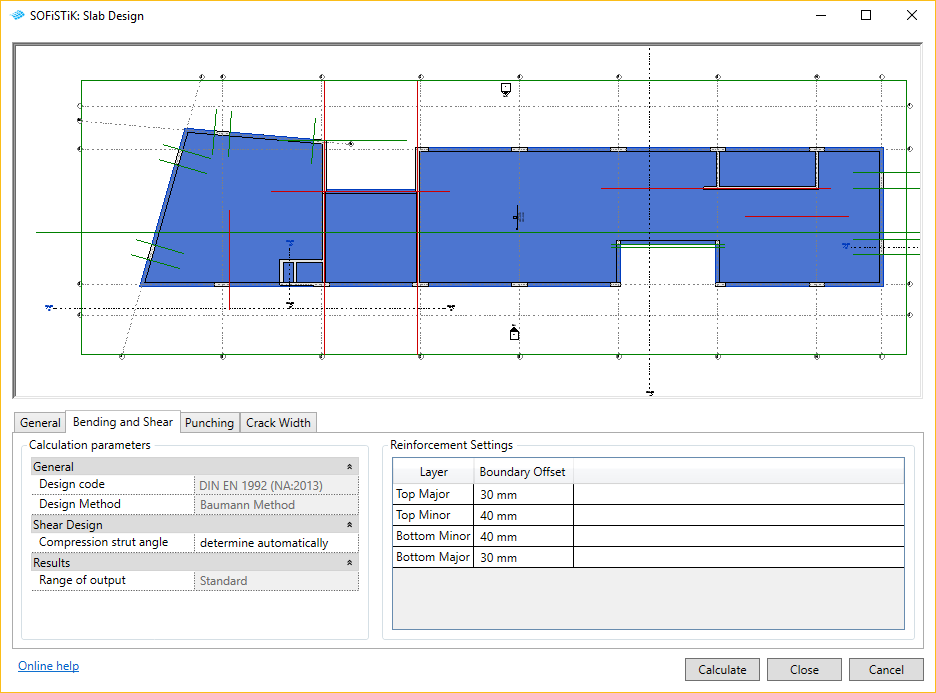
The design configuration dialog shown above, contains 4 tabs and an 2D overview of the selected slabs:
Tab General: provides general information including the Design Group name
Tab Bending and Shear: allows to set reinforcement boundary offset and the compression strut angle
Tab Punching: allows to activate or deactivate the punching design
Tab Crack Width: allows to set crack width, reinforcement settings and to select kind of crack control
When successfully closing the dialog, the selected slabs will be assigned to a so-called ‘’Design Group’’ allowing to identify the set of slabs for later readjustment and recalculation. Design groups are organized in the SOFiSTiK Design Browser. There, the stored design configuration can be opened again for modification or completion of the analysis. It also allows to change the data source for the design groups, to start the design calculation or to access design reports.
When closing the dialog by clicking Calculate, the SOFiSTiK Analysis Task Monitor appears and the design calculation is performed. After successful completion of the calculation, the design report can be opened.
Important
Slab designs can only be performed if the system used as data source has been generated and its load cases calculated.
Hint
The major direction for the reinforcement settings is the span direction of slab. The minor direction for the reinforcement settings is always orthogonal to the major direction.
Note
In case the Design Browser is not visible, it can be opened through the menu via .


