Materials
Displays the mapping table between Revit structural materials and SOFiSTiK materials for verification and modification.
Click .
Verify SOFiSTiK materials assigned to Revit materials.
Modify or create SOFiSTiK materials if required.
Use the invalidation arrow to reset a material to its default mapping
For the generation of Finite Element models from a Revit project, each material in Revit needs to be associated with a design code complying SOFiSTiK material. This association is carried out through the Material Mapping table.
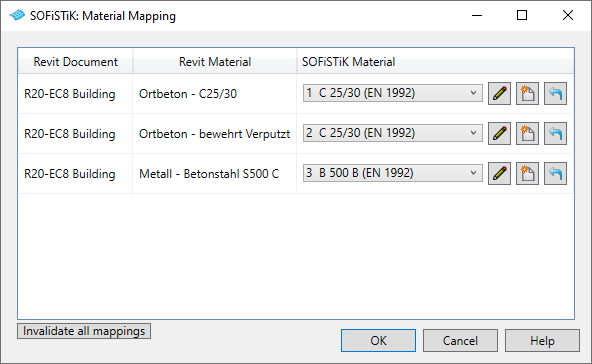
In this table, you can create new SOFiSTiK materials or edit the existing ones to adjust the mapping.
When opening the material mapping table the first time or generating the model without prior adjustment of the material mapping, SOFiSTiK Analysis + Design tries to automatically detect SOFiSTiK materials matching best to the given Revit materials. This detection uses primarily the physical strength properties of the Revit material in case these properties are specified in the Revit material browser. This is for:
Concrete, the nominal concrete compression strength
Steel, the nominal yield strength
Aluminium, the nominal yield strength
Other physical properties like the Young’s Modulus, the Poisson’s Ratio or the density will not be evaluated. These values will also not be transferred to the SOFiSTiK material. Please make sure in the material mapping table, that the properties of the assigned SOFiSTiK material matches the desired properties.
Note
Only materials used in structural elements visible in the active Revit view are displayed in the mapping table.
Note
“Invalidate all mappings” is breaking the association for all items in the table. Next time the dialog is opened, the software will generate anew a default mapping. Use SOFiSTiK Project Settings to delete or import SOFiSTiK Materials.


