Settings Dialog
The Settings dialog provides the project-wide definitions such as the desired language or operational mode. The settings together with the families are part of the SOFiSTiK Content Pack.
Tip
The “Import…” Button allows you to load a SOFiSTiK Content Pack (dialog settings + families) into your project.
Tab General
In the General tab, you can set the desired SOFiSTiK Content Pack, the Standard for the representation of reinforcement and the calculation method for reinforcement lengths.
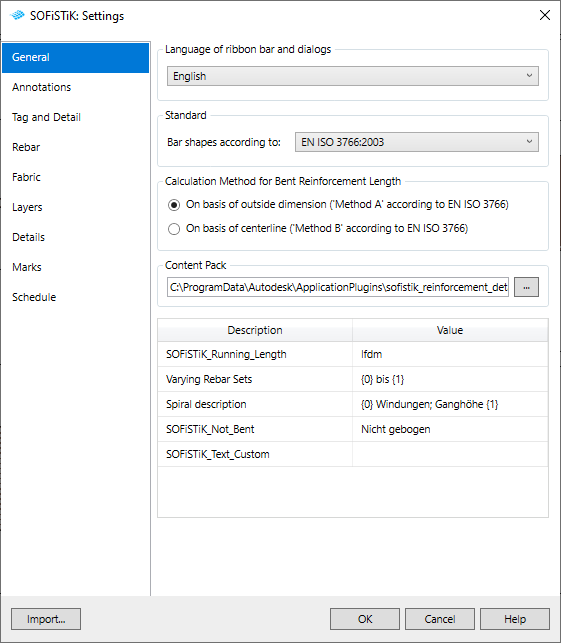
Standard
Sets the desired standard for rebar shape code detection. You can check the detected shape code with the SOFiSTiK_ShapeCode parameter.
Calculation method of bar lengths
Specify whether the bar length (cut length) shall be calculated based on outside dimension (Method A) or centerline (Method B).
The calculation of the bar length takes into account the Revit reinforcement rounding settings. To minimize rounding differences, Method A totals the not rounded segment lengths first and rounds the result only once. Hooks lengths will be calculated and added according to its Revit settings.

Tip
You can check the calculated bar length on the properties palette with the parameter “SOFiSTiK_Bar_Length”.
Note
Reinforcement rounding changes come into effect after restarting the Set Marks tool.
Content Pack
Shows the path to the current Content Pack and provides the possibility to change it.
Text Parameters
In the SOFiSTiK Text Parameter table you can set custom information which can be used in schedules and for annotation purposes.
Note
The placeholder in the curly brackets for the spiral “{0}=Number of spirals, {1}=Distance between spirals” will be filled automatically.
Tab Annotations
The Annotations tab provides user-specific adjustments for the automatic tagging tools Tag All and Tag Missing.
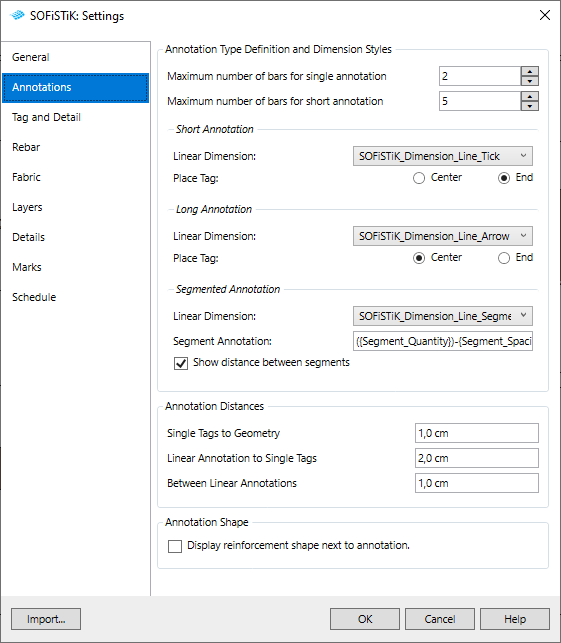
Annotation Type Definition and Dimension Styles
An annotation type means a rebar tag combined with a dimension line. Other than the Single Tag which has a leader instead of the dimension line. Depending on the quantity of rebars in a rebar set, the tagging tools use one of the following annotation types.
Single Tag
Short Annotation
Long Annotation
Segmented Annotation
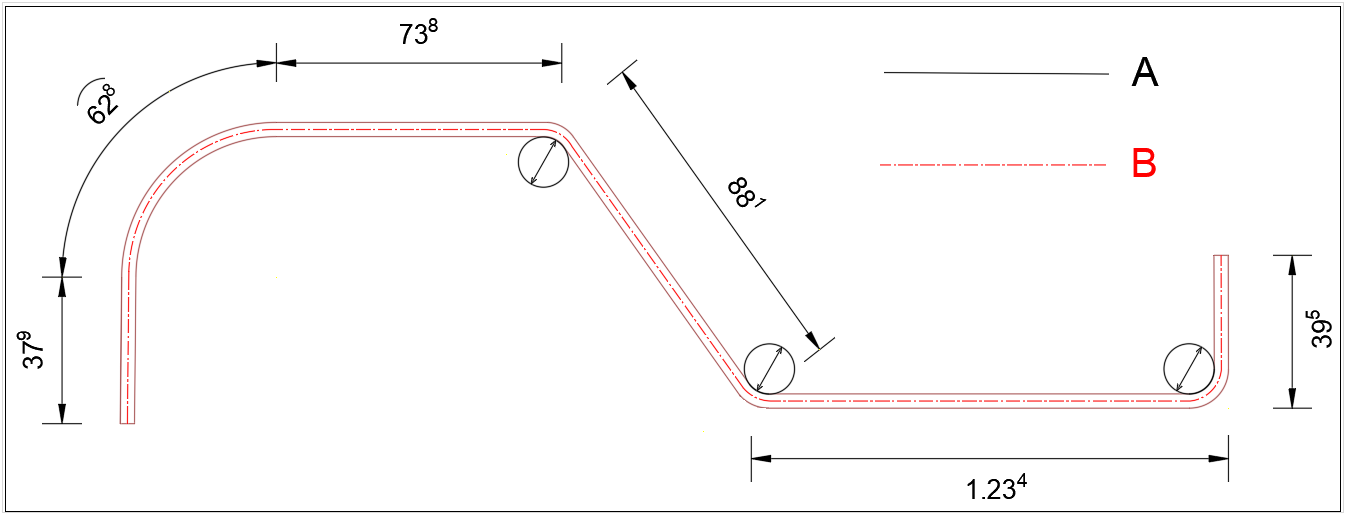
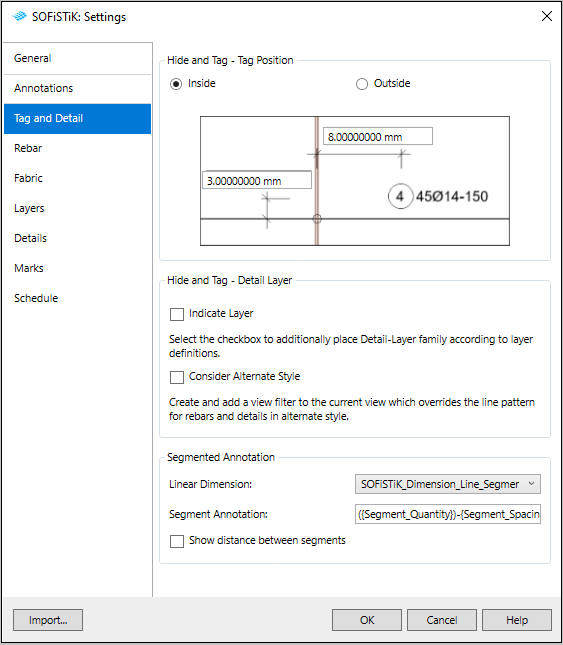
Segmented Annotation
The Segmented Annotation only applies for the SOFiSTiK Rebar Layout Moved Segmented. You can define your custom annotation for rebar segments and whether the distances between the segments shall be annotated or not.
For example, Segment Annotation: ({Segment_Quantity})-{Segment_Spacing}
- The supported segment information are:
Quantity of bars in the rebar segment {Segment_Quantity}
Spacing of bars in the rebar segment {Segment_Spacing}
The corresponding rebar tag families can be set on the tab Rebar.
Annotation Distances
The annotation distances allow adjusting the placement of the rebar tags for the tools Tag All and Tag Missing.
Tab Tag and Detail
The Tag and Detail tab provides user-specific adjustment for the tool Hide and Tag.
Tab Rebar
In the Rebar tab you can set the annotation families for the tools Tag All and Tag Missing as well as the rebar stock length and an increment for running length marks.

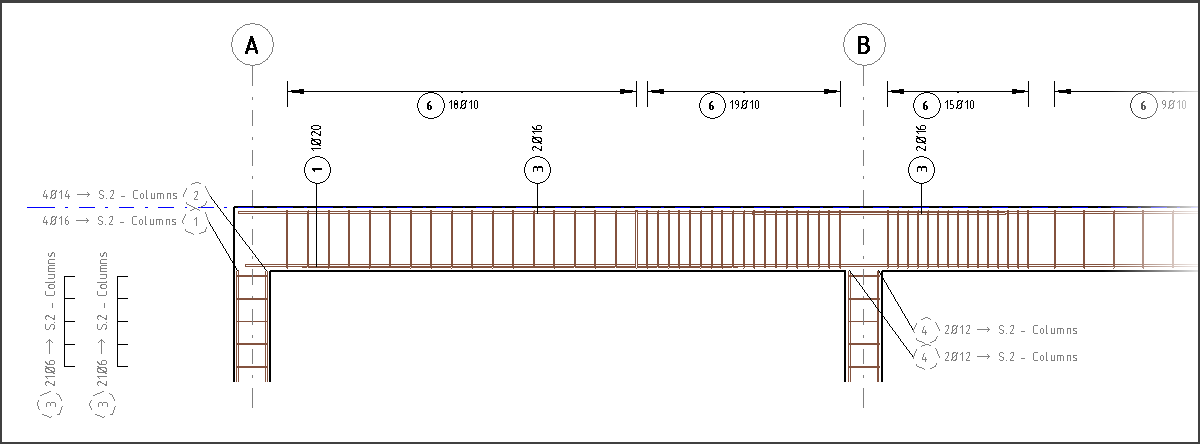
Annotation Families
In the operational mode “Marks per Sheet” you can set a separate tag family for rebars, which are assigned to another sheet. In the following example, beam’s reinforcement is assigned to the current sheet and column’s reinforcement to another one.
Tab Fabric
In the Fabric tab you can set the annotation and symbol families for wire meshes for the tools Tag All and Tag Missing.
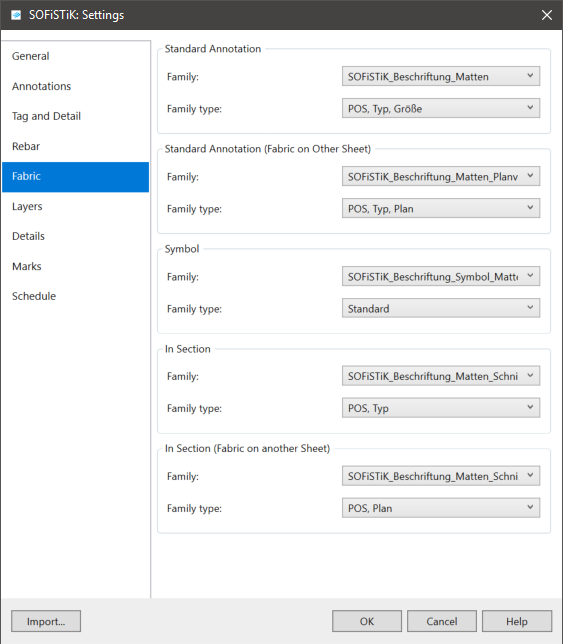
Fabric of other Sheet
In the operational mode “Marks per Sheet” you can set separate tag families for wire meshes, which are assigned to another sheet.
Symbol
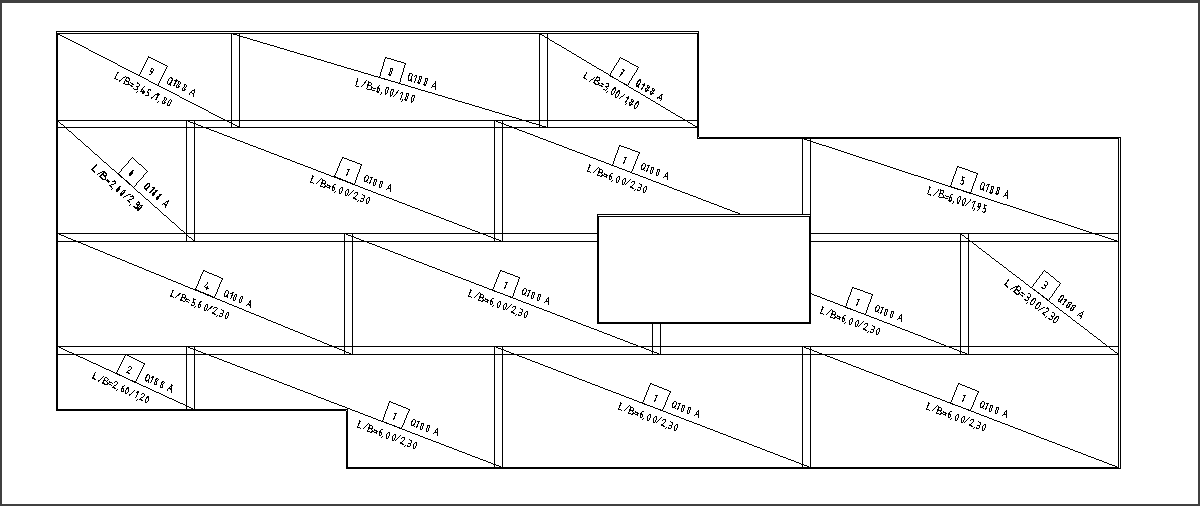
You can set a fabric symbol family which represents wire meshes in front views of floors, walls and foundation slabs.
Note
Wire meshes in sections will be annotated with a single tag for each visible mesh in the view.
Tab Layers
In the Layers tab you can set the Layers Definition.
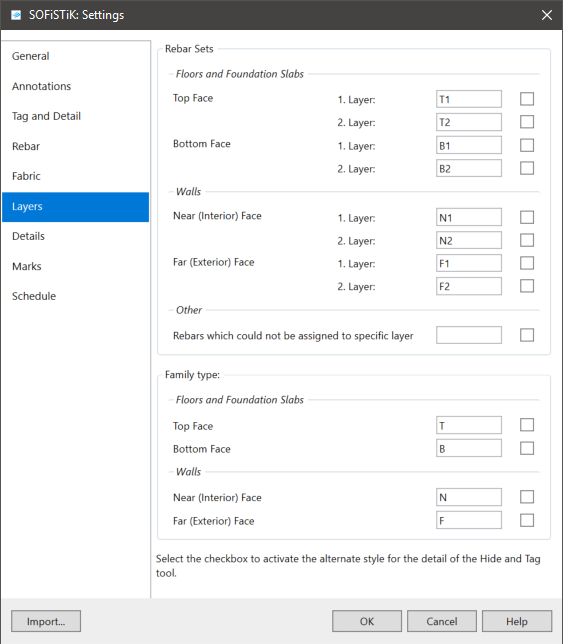
Layers Definition
In the Layer Definitions you can set or edit the layer names for rebar sets and fabrics in area elements (floors, walls, foundation slabs). The given names will be used by the Layers tool.
Note
Select the checkbox to activate the alternate style for the tool Hide and Tag and Hide and Detail.
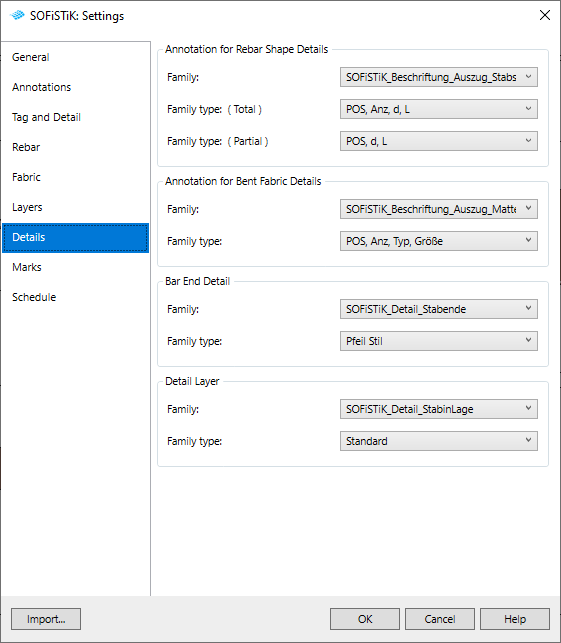
Tab Details
In the Detail tab you can set the detail families for the tools Shape Detail, Bar End and Detail Layer.
Tab Marks
In the Marks tab you can define several reinforcement numbering rules for the tool Set Marks.
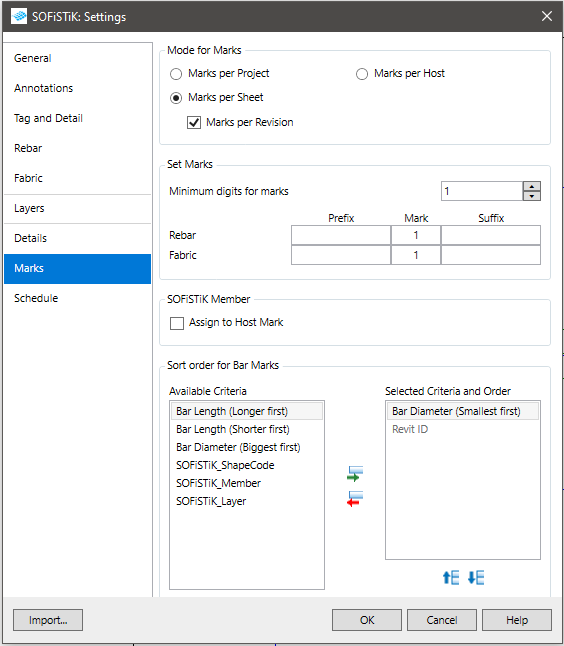
Mode for Marks
Numbering of reinforcement can be either per project, per sheet or per host.
Marks per project: The reinforcement is assigned to the entire project. The marks must be unique and you can create only a project wide bending schedule. This mode is recommended for smaller projects.
Marks per sheet: The reinforcement must be assigned to a specific sheet (see command Assign to Sheet). As in common conventional practice, in this mode you can create bending schedules for each individual sheet. Activate the Checkbox Marks per Revision will result in different marks for equal rebar from different Revisions.
Marks per host: The reinforcement is assigned to its host. In this mode you can create bending schedules for each host element individually.
Note
It is important to be clear about the desired mode from the beginning, as many tools adapt in their operation to the operational mode.
Set Marks
Set the (minimum) digits (e.g. 1, 01, 001) for marks which will be set from the Set Marks tool.
You can define a Prefix and a Suffix for Rebar - and fabric marks by an individual combination of free texts and rebar parameters. The rebar parameters have to be written in curly brackets.
For example, Prefix: {SOFiSTiK_Member}-
Tip
You can use the Set Marks tool to apply a changing of the prefix or suffix definition to all the existing reinforcements at once.
Note
These characters () [ ] $ / + * are not allowed be used as prefix or suffix.
SOFiSTiK Member
You can use the SOFiSTiK_Member parameter to define the rebar as a member of a group.
Select the checkbox if the mark of rebar host should be defined as group and assigned automatically. Otherwise you will be able to fill the parameter with your individuell group names manually.
Tab Schedule
In the Schedule tab you can define settings for the tools Create Images, Export For Production (BVBS) and Create Schedule.
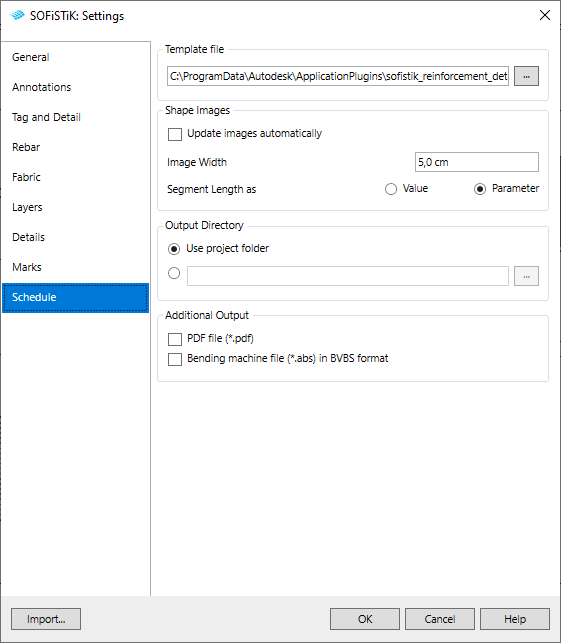
Template file
For the Create Schedule tool, a customizable (docx) schedule template can be choosen.
- The following default schedule templates are supplied:
SOFiSTiK_Schedule_Template_DACH.docx
SOFiSTiK_Schedule_Template_EU.docx
SOFiSTiK_Schedule_Template_FR.docx
SOFiSTiK_Schedule_Template_UK.docx
Note
For more information (e.g. How to customize the schedule) read the Reinforcement Schedules page, please.
Shape Images
You can use the Shape Images of rebars and fabrics very comfortably in Revit schedules (see Shape Images tool).
If the checkbox is selected, the shape images will be automatically updated after any change at the corresponding rebar.
You can set the desired width for the shape images.
You can choose to represent the segment lengths as value or as parameter.
Additional Output
Activate the checkboxes to create the schedule in PDF format (.pdf) and to create a rebar bending informaton file (.abs) for bending machines additionally to the schedule in Word (.docx) format.


