Parapets
Create
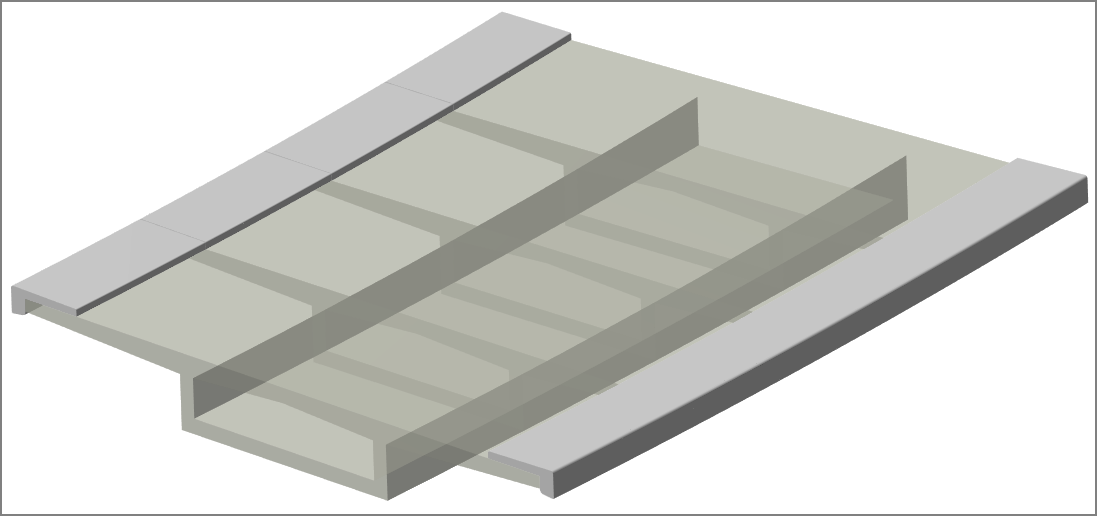
Creates a 3D model of a bridge parapet along the chosen edge. The geometry of the parapet is defined in Parapet Profile Revit Family.
Click SOFiSTiK Bridge tab
 Create panel
  (Parapets) drop-down
  (Create)
SOFiSTiK: Parapets dialog displays.
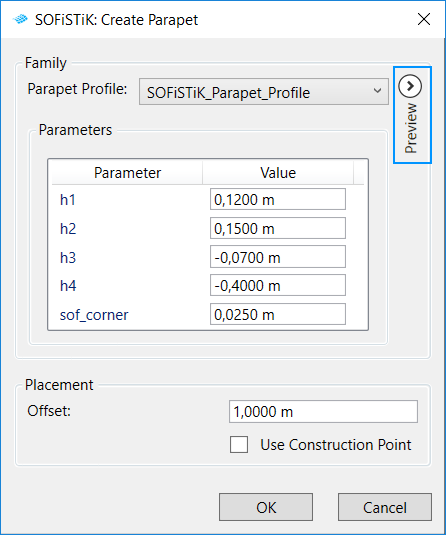
Choose appropriate Parapet Profile family and an Offset and click OK.
Select an edge or activate ‘Multiple’ checkbox in left top corner, select edges and click Finish.
Tip
When ‘Use Construction Point’ checkbox is activated, the parapet’s width will be stretch to the next construction point in the cross section definition. Therefore, in order to obtain variable width of parapet, you can define an additional construction point in Cross Section Editor and assign variable.
Note
While selecting multiple edges, make sure that all the edges are creating continuous line.
.
Please accept marketing cookies to watch this video.

Edit
Edits a 3D model of a bridge parapet. The geometry of the parapet is defined in Parapet Profile Revit Family and selected edges.
Click SOFiSTiK Bridge tab
Create panel (Parapets) drop-down  (Edit)
Select Bridge Parapet
SOFiSTiK: Parapets dialog displays.
Choose appropriate Parapet Profile family and an Offset and click OK.
Select an edge or activate ‘Multiple’ checkbox in left top corner, select edges and click Finish.
Duplicate
Duplicates a 3D model of a bridge parapete. The geometry of the parapet is defined in Parapet Profile Revit Family and selected edges.
Click SOFiSTiK Bridge tab
Create panel (Parapets) drop-down  (Duplicate)
Select Bridge Parapet
SOFiSTiK: Parapets dialog displays.
Choose appropriate Parapet Profile family and an Offset and click OK.
Select an edge or activate ‘Multiple’ checkbox in left top corner, select edges and click Finish.


