Tower#
This command places a so-called Tower in your project in order to help organize Storeys. When analysing a system, this family is interpreted as a SOFiSTiK Tower.
Revit Family Tower#
A Tower is an instance of a specific Revit family called SOFiSTiK_Tower provided by SOFiSTiK. See Family Content for more information.
It is represented by a vertical box with an rectangular floor print, spanning between two levels. By default, the Tower is oriented in the project coordinate system but can be rotated with standard Revit commands.
Properties and Parameters#
SOFiSTiK Structural Properties shows an aggregated list of the most important properties of Towers:
Property |
Description |
|---|---|
Name |
Designation which will be printed out in report. Maximum 32 characters, certain special characters not allowed. |
Top storey level |
Upper bounds of Tower. A Storey will be created if necessary. |
Base storey level |
Lower bounds of Tower. A Storey will be created if necessary. |
Storey Level Association |
Enables highlighting (selection) of all associated levels. |
Storey Level Selection |
Edit which levels are associated to the tower. |
See also
See Project Parameters for more information how we handle data.
Working with Towers#
Towers are mostly used for the seismic analysis of complex projects, where building parts are investigated independently. To learn more, see Further Notes.
Preparing Storey Levels#
Towers and Storey Levels are working together. Therefore, the first step of the Tower workflow, is making sure the export property of each Revit level is adequate.
The export property of a level can be conveniently controlled in the SOFiSTiK Structural Properties:
Export as Storey Leveloffers the following options:Dropdown
Description
Value[2]
Auto (default)
Only levels which contain relevant elements[1] will be exported.
0
Always
These levels will always be exported, no matter if relevant elements[1] are detected.
+1 (>0)
Never
These levels will never be exported, even if relevant elements[1] are detected.
-1 (<0)
Nameallows a user-defined name different from the Revit object. This name will appear for the respective SOFiSTiK element. If no name is defined, the name of the Revit object is used as a fall back and written into*.cdb.This property is synced with the shared parameter
SOFiSTiK_Nameif activated in Project Parameters.
Modelling of Towers#
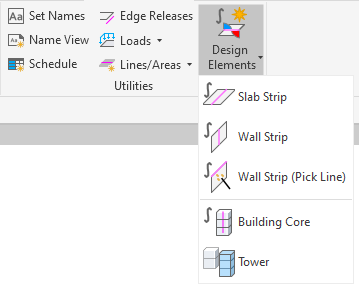
Click .
The Revit Family is loaded into the project and the Place Family Instance mode is activated.
The current view rotates in an oriented Top View.
Place the Tower center in the estimated location (at this step, ignore Revit’s level assignment).
The SOFiSTiK: Tower dialog opens:
Define the tower’s Top Level.
Define the tower’s Base Level.
Define the Level Selection.
Please note that only Levels marked
Export as Storey Levelwith valuesAlwaysorAutoare offered in this dialog, while those withNeverare hidden. Top Level must always be above Base Level and vice versa. Level Selection covers the range between Top and Base Level only.Finish with OK.
Adjust the horizontal extents of the Tower with known Revit functionality, such as:
Dragging the handles in a 3D view,
Dragging the handles in a 2D view,
Using Align or Move,
Modifying the values of properties
SOFiSTiK_Tower_WidthandSOFiSTiK_Tower_Length.
Storey Level Selection#
If a Tower is present and visible in your view, it is crucial that all Revit Levels are assigned to at least one Tower. During export, any resulting Storey Level that is not assigned to a Tower will throw an error and be reported in Warning Messages
If any one Revit Level is assigned to multiple Towers, this will result in multiple, independent SOFiSTiK Storey Levels with the same elevation being exported. Each Storey Level will have a unique Storey Number but share a common Storey Designation.
Analysis in Revit#
Click to open the SOFiSTiK: Analysis dialog.
On , check Analyze Load Cases.
On , check Export Storey Levels.
On , check Calculate Center of Rigidity and Center of Mass.
Important
This function is only available if SOFiSTiK FEA 2024 is installed.
Finish dialog with Calculate.
Check the respective chapters of Module FEABENCH and ASE: Storey Forces in the Report. If something went wrong, the SOFiSTiK: Warnings dialog will appear.
Further Analysis/Checks in SSD#
Open
 SOFiSTiK Structural Desktop (SSD) for the system where the Towers were active.
Perform a Storey Checks for each Tower individually.
See also
For more general information, please refer to:
Manual of module SOFiMSHC:
and
.
Manual of module FEACHECK:
.
Manual of module FEABENCH:
.
The descriptions of Storeys and Towers Workflow and Storey Checks.